Pulled Pork on a Weber Kettle Grill

Introduction: Pulled Pork on a Weber Kettle Grill

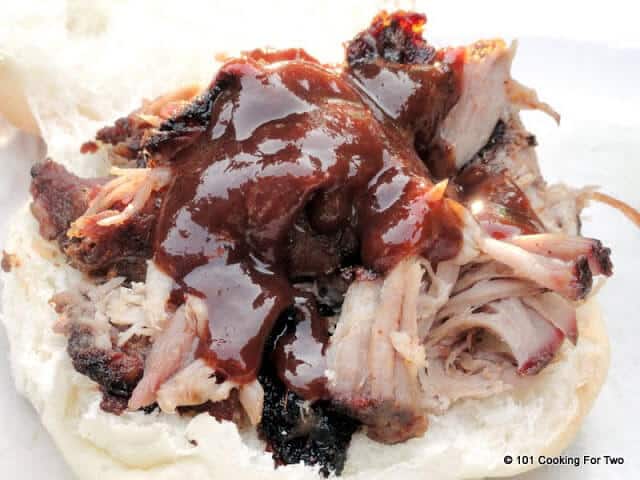
The best meal that takes a day to make and a few minutes to eat: pulled pork
Step 1: The Grill

BBQ is low and slow cooking. Although most 'Qers make pulled pork on a smoker, the same results can be achieved on a kettle. In fact, the benefit of a kettle is that you can grill and BBQ. By grilling, you use direct heat directly under the meat. (Think: steak) With BBQ, you use indirect heat, which is more like using an oven.
Step 2: The Meat & the Rub

Pulled pork is made from a cut known as a Boston butt. The butt is the upper part of a pork shoulder. When shopping for a boston butt, be sure it is not boneless. The bone adds tremendously to the flavor of the pork.
2 Tbls Sweet Paprika
1 Tsp Freshly Ground Pepper
1/2 Tsp Ground Mustard
1/8 Tsp Celery Seed
1/2 Tsp Ancho Chili Powder
Step 3: Ready the Chips

Step 4: Ready the Charcoal

Cooking a five pound pork shoulder can take upwards of 9 hours. That is a long time to keep your kettle grill at an optimal temperature of 250 degrees. Also, you want to minimize the number of times you open the grill lid because every time you do, you lower the grill temperature and effectively lengthen the amount of time for your cook.
Step 5: Here Comes the Heat

Heat the coals until they have ashed over (turned grey).
Step 6: Placing the Pan and the Coals

Place an aluminum foil pan in the bottom of the kettle in the location that will be directly below your meat. This will either be in the middle, or off to the side. Place a small amount of water in the pan. This will catch any droppings from the meat and prevent them from burning.
Step 7: The Chips Are Down

Add a handful of soaked wood chips to the lit coals. Place the grate on the kettle, close the lid, and wait for.
Step 8: Smoke!

Step 9: Work the Vent

The temperature of the kettle needs to be around 250 degrees. This is done by controlling the top and bottom vents of the grill to restrict the flow of oxygen. To make controlling the vents easier, I marked the position of the vents on the bottom ash catcher. To start out, move the bottom vent to half and close the top vent almost all of the way.
Step 10: Watch the Temp

Although controlling the temperature of the grill by the vents might seem difficult, it's not.
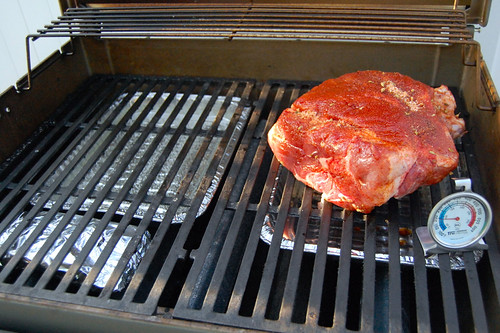
Step 11: Meat on Deck

With smoke pouring out of your grill and the temperature gauge around 250, you are ready to place your pork on the grill.
Step 12: Downtime

Plan on at least 9 hours to cook your pork. This is in addition to the prep time of readying your grill. Needless to say, if you are planing this meal for dinner, start early or your "dinner" may turn into a "midnight snack"!
Step 13: Still Waiting.

Avoid opening the kettle lid at all costs. Doing so will just let out valuable heat. Instead, grab yourself a good beer, sit back and enjoy the sight and the smell of your grill.
Step 14: Almost There

You want to cook the pork until it has an internal temperature of 190 degrees. Although the pork is technically cooked past 150 degrees, 190 degrees ensure that this tough piece of meat is transformed into a moist and delicious feast.
Step 15: Done!

With your temperature probe reading 190 degrees, your pork is finally done. Remove it from the grill and wrap it aluminum foil. You will want the pork to rest anywhere from 15-30 minutes.
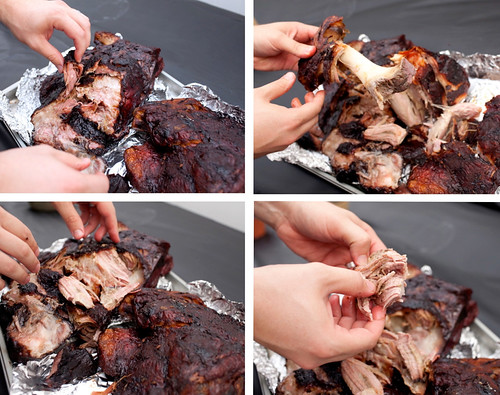
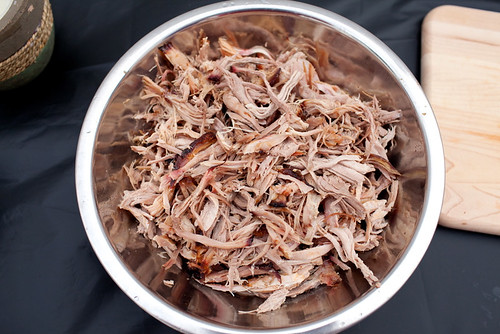
Step 16: The Pull

You can pull the pork using a fork, a knife, your hands, or whatever! As you do, be sure to check for the smoke ring. The smoke ring is a pink ring around the outside of the meat that was created by all of the smoke in the grill. Also, be sure to take a quick taste of the "bark". The bark is the thick covering on the outside of the pork. it is always delicious.
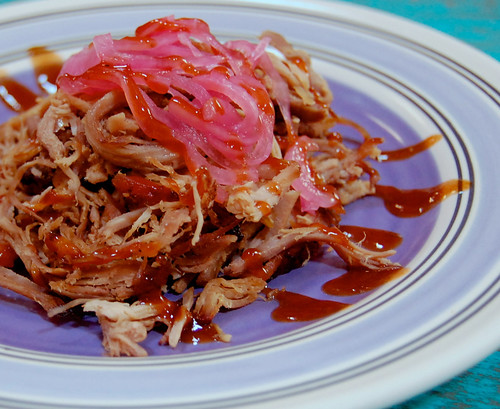
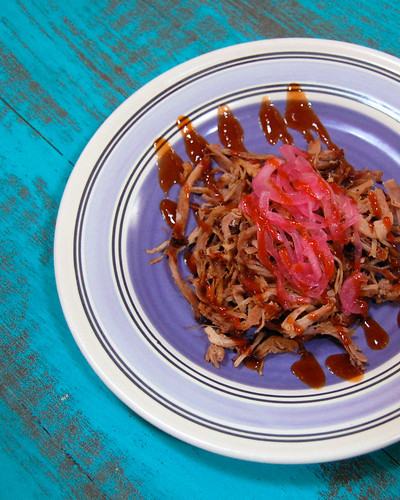
Step 17: Come and Get It

With your pork masterpiece complete, you can serve it however you like and with whatever you want. You can top it with a vinegar sauce, mustard sauce, or red sauce. Bun, or no bun, it is entirely up to you.
Loved this technique!
Thank you so much for the great post! Here's my recap: http://bit.ly/2ieoatd
Inspiring post. I'm trying it and my temp will not come down. At 300 and I have shut the bottom and top vents. Anny ideas?
Thanks! And sorry you are having issues. Try adding more water to the water pan. It will help act as a heat sink and bring the temp down. I hope that helps!!
I'm 4 and half hours into the smoke and it is working great! I love my Weber and really didn't want to drop the cash on a dedicated smoker, thank you for posting this and saving me some money! Now I have more cash for my other love, cigars! Cheers!!
That is awesome, Glenn! So glad to help! Looks like you are going to feast. Love the cigar, too!!
What size is the butt you used for this recipe? 9 hours must have been pretty large and I can't see where you mentioned a weight anywhere. Thanks!
Just wanted to say thank you for this write-up. I love my Weber Kettle and have always wanted to try a pork butt. My first attempt wasn't a complete success, but turned out OK and was a learning experience. Yesterday I gave it another shot; short of me not allowing enough time and having to finish in the oven in the house, it came out great!! Thank you again.
Oh wow, that's fantastic! I'm glad it all turned out. Thanks for letting me know!
Excellent article, very informative thanks! First attempt with my Weber very successful. Even managed to maintain temperature easily with only one side of lumpwood lit (the other went out early on).
Whoa! Looks fantastic! Thanks, I'm glad it turned out so well!!
Meat has been on for about 2 hours and twice now, smoke has completely stopped coming out. Is that normal? Hubby did a no/no and opened to add more chips. Smoke continued. Smoke stopped about 30 min ago again.
Hey! That's pretty normal depending on how many chips were added. Smoke should not run the entire cook, so it will taper out eventually as the chips are consumed. Good luck!
You have taken great photos!! Thanks for the post. I will be enjoying this in only a few minutes.
That is awesome! Thanks!!
is the temperature in Celsius or fahrenheit?
Must be Fahrenheit. 250 Celsius is mega high for a slow cooked food
My weber 22.5 inch does not have a temp gauge. What is the best way to measure temp?
How about a digital thermometer where the probe is connected by a steel cable? If so I like to run the probe through a potato that has been cut in half. The potato is then set on the grate near the meat and measures the internal temperature of the grill via the cable hooked up to the thermometer.
Thanks for the instructable! I'm one hour into this, and feeling excited. I struggle with understanding how these 90 briquettes can last 9 hours. Let's see. I'm using the potato technique with my probe. At first, I misunderstood and put the probe into the potato but not through it. For later readers, just a tip to put the probe all the way through so that it is exposed to the ambient air temperature. Duh.
I bought a thermometer and drilled a hole in the top. In took just a few minutes.
I usually put an old fashioned meat thermometer through the top vent with a little foil wrapped around the probe to block the breeze around it. Also you can get the meat temperature by threading the cable of a digital thermometer through the vent and sticking the probe into the meat. The digital readout sitting outside nearb so there's no need to lift the lid.
The Minion on a Kettle produces epic pulled pork. Time for a WSM
Is it weird that I knew this was you by the pic of your grills and patio?
Ha!! Not at all, Jeff! Thanks for noticing!!
I don't yet get the idea of the coals. So I put 45 on each side, and light up 20. Do I put 20 on one side or do I put 10 on each side?
put 10 lit coals on either side if you split the 90 in half. it's easier to just stack about 90 up against one side. about 15 lit ones are enough to get this going. if you are serious get a pit temperature controller. like the ones BBQ guru make. They will keep the pit temperature spot on.
Thank you for the info. Will let you know the results. I'm thinking, nothing but perfect.
I did a 5lb roast and it was awesome. I would like to do a 10lb roast this weekend how much time should I allow for cooking this larger roast?
10 pounds will probably take about 2 1/4 - 2 3/4 hours. Glad the first one turned out so good! Good luck!
I posted a few weeks back and tried my first smoke a few days later. I had issues lighting my charcoal to start but everything else went smoothly. But due to my setup, if I had to add fuel or smoking wood, I had to remove the grill grate each time(I left everything on the grate including the meat so I bet I looked silly). To avoid that this time, I am going to give the snake method a shot. Anyone have any tips for the snake method?
One tidbit I learned that may help others(sorry if it has been mentioned and I missed it):
If you are having trouble hitting 190 near the end, you can preheat your oven to 225-250 and bring the meat to temp there. All the smoking that can be done is already done so no worries there. Just cover the meat with foil first but be warned---your house will now smell of all that wonderful goodness while you wait! I will get pictures this time if I remember during crunch time!
Excellent. Im from California and living in Brazil. I am a cook and Im working on a fish taco biz here rite now. I want to incorporate BBQ pulled pork sandwihes in to my menu and I bought a Weber to start on till I can build a proper big smoker. This is an excellent article and method. I can see that it would really work. Thank you.
That is awesome! Pulled pork on "anything" is fabulous. Sounds like you have a great plan. I'm glad I could help!
I'd add that getting a good digital thermometer is a huge help. NEVER trust the one built into the grill! I bought a Maverick which has a remote unit so I can monitor meat and grill temp from inside if I need to. Watching football, making pulled pork at the same time!
That is a great point! Multitasking was never so much fun!!
I am confused. How many charcoal brick-ettes are used? I seem to have read two different numbers and am a stickler for details, especially since this will be my first smoke and possibly for a dinner gathering. This is a great guide though. I will definitely be using it in a week or so!
Hi! No worries and thanks! You probably read this:
Place approximately 90 unlit coals to one side of your grill, or two piles of 45 coals to both sides.
Place approximately 20 coals in your charcoal chimney and light the chimney.
In essence, you will use 90 unlit coals and then later top that with 20 lit coals. How you organize the unlit coals in the kettle is up to you. Good luck!
Smoking in Astoria Queens.
Just set up my weber kettle to slow smoke a large pork shoulder. I cut off the skin leaving some fat on the meat, seasoned with my own light brown sugar Paprika rub, skin and joint and let them sit for an hour at room temperature while tinkering with the temperature of the grill. One side foil pan with water the other Royal Oak real wood charcoal. The smoke turned blue and the apple chips filled up my backyard with a foresty smokey aroma. The upstairs neighbor shouted out the window,'What are you cooking? It stinks!' She has always been a firm believer of using her mouth as a weapon. Not wanting to encourage her I trundled the kettle down an alley where the smoke moved in a different direction. Got the heat right again and popped the meat on the grill. I laid the seasoned skin on top so that the fat would baste the joint. When the meat hits the right temperature I will wrap in foil and let it sit. Add a few more chips a couple of oiled slices of eggplant and the skin on the grill and let that cook while the meat sits. Yum
My wife is going to use the smokey eggplant to make Baba Ghanoush
Wow, that all sounds great! Too bad your neighbor didn't know the magic you were creating!!
Now I have to wait.
Thanks for the info and so easy to follow along. This was my first time cooking pulled pork. When it was done the bone pulled right out. And the meat just fell apart it was yummy!! Now we're going for round two.
Thanks for the info and so easy to follow along. This was my first time cooking pulled pork. When it was done the bone pulled right out. And the meat just fell apart it was yummy!! Now we're going for round two.
90 briquets?! How big is your Weber??
Ha! Yup, 90! It's a standard 22.5 inch kettle. You need a good load of fuel to get through the cook.
I've been using weber grills for years and if I were to use 20 briquettes on each side as you suggest the temp would be 300 to 350..i usuall use 14 each side and add 6 every 45 mins
You are completely right if it was 20 a side, but it is 20 total, with only 10 each side. Although since I've posted this, I've moved to two zones with all the charcoal to one side. About 5 hours in, I rotate the pork and if necessary, add a few more coals to finish out the cook. Cheers!
Sure did :) took another hour and a half but it turned out great! Love that rub recipe
It's probably a little too late to ask now as I'm almost done but obviously for a smaller piece of meat it won't take as long? I'm 5 hours in and hitting 170 but just cooking a small picknick roast.
About This Instructable

Newsletter
Let your inbox help you discover our best projects, classes, and contests. Instructables will help you learn how to make anything!
Pulled Pork Recipe
When I think of barbecue, I think of pulled pork sandwiches. The fact that the meat has been cooked long enough to allow it to literally be pulled apart by hand is a signal of the time and attention someone put into cooking that for me. One day, I too will have a legitimate smoker built out of an old refrigerator or something, but my wife would move out if I start one mor project! So for now, I have to smoke my pulled pork in my gas grill. It's ok though, it's actually a lot easier to set up. When grilling meats like pulled pork over a long period of time, maintaining a constant temperature is key. Using a grill with a 3 to 4 burner system makes this pretty easy. Let's take a look at how easy delicious pulled pork sandwiches are to make on a gas grill.
1 bone-in Boston Butt (I like to get about a pound for every person I am feeding)
Wood chips, enough to make about 4 or 5 smoke pouches
2 tablespoons Paprika
2 tablespoons Dark Brown Sugar
1 teaspoon Garlic Powder
1 teaspoon Dry Mustard
1 teaspoon Onion Powder
2 teaspoons Kosher Salt
1 teaspoon Chipotle Powder
1 Soak all of your wood chips for at least 30 minutes, that will give us time to get everything set up for the grill.
2 Mix together all of the seasoning to make our rub. You can use other ingredients here, that's just my favorite combination for grilling pork. Use the same ratio of Paprika and Dark Brown Sugar, but use a teaspoon here and there of whatever you think sounds good.
3 Once all of the rub ingredients have been thoroughly mixed, rub it all over your Boston butt (for some reason, I still giggle saying or typing those words). Make sure you cover the entire pork roast with the rub.

1 Allow the pork to sit on the kitchen counter for about 30 minutes while we get everything else going.
2 Heat the grill for indirect heating. I've talked about this before, your grill may have a thermometer, but don't trust it. Use an oven thermometer like I discuss in this post. For a 3 to 4 burner grill, light the 2 outside burners on high heat and place the oven thermometer in the center of the grill. Our goal here is to maintain around 325 degrees.
3 While the grill heats up and our pork roast is getting aquainted with it's rub, assemble 4 to 5 smoke pouches. We will need about that many to keep the smoke going for the duration of the cooking time. Once you have the first ready, go ahead and place it over the hot part of the grill and close the lid.
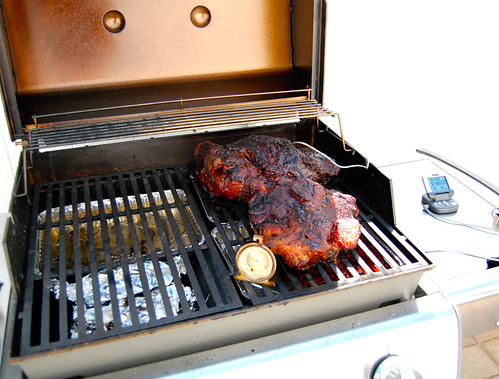
4 Once the first smoke pouch starts to smolder on the grill, it's time to start cooking. Place the pork in front of the oven thermometer in the middle (cool part) of the grill. Here's a photo of our setup (this was after a few other smoke pouches had done their thing, but you get the point):

1 Now here's the easy part, turn the oven thermometer so that you can see it through one of the holes on the side of the grill and just close the lid. We are going to let the rub, fire and smoke do it's thing for a long time, so just leave it alone.
2 Look through the holes on the grill periodically to see if you are still in that magic 325 degree range. Adjust the burners accordingly. Also, once you start to see the smoke slowing down on one smok pouch, just add another. You'll probably end up adding a new pouch every hour to hour and a half.
3 After about 4 hours, check the temperature of the pork roast by inserting an instant-read thermometer in the thickest part of the roast. We are looking for a temperature around 190 - 195 degrees. You will notice that the meat starts to pull away from the bone and you can wiggle the bone more and more as you get closer to 190 degrees. At 195 degrees, the bone will pretty much pull our of the meat with little effort.
4 Once your meat has reached 195 degrees, remove the boston butt (pork roast) from the grill and place on a platter to rest. You will need to give it a good 30 minutes or so before you can even think about handling the meat on the inside. After about 15 minutes, I like to cut it in half to help the middle cool off.
5 Once cool enough to handle, begin to pull the meat apart using your fingers and/or 2 forks. This is why they call them pulled pork sandwiches! Pull all of the pork apart and place the meat on a separate platter.
That's all there is to it! You just smoked a pork roast or boston butt on a gas grill. Toast some good buns, add a little of your favorite barbecue sauce and serve with some homemade coleslaw. This is the way God intended us to enjoy swine, pork cooked so slow and low that it just pulls off the bone. Pulled pork sandwiches are always just a few hours, some wood chips and a little love away from your dinner plate. Heaven on a bun.
Steve
November 24, 2015
Must know for any BBQ cook!
Cancel reply
Find a Recipe
Featured Recipe

BBQ Pork Chops
Like Us On Facebook
Facebook Feed
- Posted June 18, 2017
- So wrong is so many ways. But I am curious. 😃 Posted February 26, 2017
About Grilling Companion
Grilling Companion is a grilling magazine site for BBQ and grilling fans in search of great recipes, tips and news from around the web. This site was built by 3 regular guys who wanted to create a place on the web to share stories and grilling recipes with other grilling fans. Our goal was to create an online grilling companion for all your barbecue and grilling adventures.
Interested in advertising? Email info@grillingcompanion.com to get started!
© 2017 Grilling Companion. All Rights Reserved.
Pulled Pork on a Gas Grill – Not That Hard
July 15, 2012 By DrDan 9 Comments
How to cook pulled pork on a gas grill? Not all of us have smokers. There are a lot of gas grills out there. Shouldn’t we have pulled pork too? I say yes. Pulled pork for all and with a little planning it is not that hard. Just plan enough time.
So what do you need?
1) Pork. I ended up with a 4 1/2 pound Boston butt also know as a pork shoulder.
2) A gas grill with a lot of gas. I have natural gas, so I’m good to go. If you are on a tank, start with a full one.
3) A rub. Whatever rub “yanks your chain” as they say. The rub should have some sugar, salt, and various spices. Some cooks will rub it on the day before and refrigerate (I did since I had this planned) but others rub on an hour before the cooking, and I believe this is good also.
4) Some method of smoking. I have a smoking box built-in my new grill. On my old grill, I used a cast iron smoking box. You could use an aluminum foil pack of wood chips.
5) A way to watch the temperature of the grill surface. I used an oven thermometer this time but I just got my new iGrill setup for my iPad, and it is crying for a tryout and a review. I hope I get to it soon.
6) Time… lots of time. I took 11 hours on the grill then a 2-hour rest before we ate.

Yep, I could live on pulled pork.
This time I started the grill at about 7 AM and left for the hospital for 2 hours of rounds. While the grill was 250 when I left, it was 210 when I got home. It took another hour to get a steady 250 to 255. I tossed in another couple of cups of chips for more smoke. Then I didn’t touch it for another 6 hours. Not even a temp check. So at 9 hours I had a grill steady at 255 and a pork shoulder that was at 170 plus minus in several locations. Another 2 hours (11 hours total) and I had 190 to 195. I wrapped it in double foil and placed in a small cooler for 2 hours.
As I said above, use the rub of your choice. I used a variation of Meathead’s Memphis Dust from Amazing Ribs this time. Look around and you will find thousand of variations all of which will work. There are many commercial rubs also.
Here is a simple rub from my 8:3:1:1 rub post and I included it in the recipe
- 8 T (1/2 cup) Brown sugar
- 3 T Kosher salt
- 1 T chili powder
- 1 t black pepper
- 1 t onion powder
- 1 t garlic powder
Halfway, though, my old reliable Sony F717 suddenly stopped sensing red, not good. I finished some pictures with a compact camera. They are OK but not great and somewhat lacking. Sorry about that. The Sony is working again but today I have moved up to a Canon SLR. A new learning curve is ahead, but the shopping had been fun. Hopefully, you will notice the difference that will start to appear in a couple of posts.

Start with about a cup of the rub of your choice. I used a variation from an Amazing Ribs rub but 8:3:1:1 would be great. See above for choices.

Jump in with your hands and apply the rib. Wrap with plastic wrap and refrigerate for at least one hour or overnight if you can.

Soak some wood chips. These are hickory. Try to get at least one hour but overnight is OK. The moist chips should smoke longer.

Set up your gas grill for indirect cooking. This means the meat is not over direct heat. You will see a pan under the pork to catch any drippings. This is on the indirect heat side. The other side has a pan of water over the direct heat. Adjust the burners to get a steady 250 degrees.

Add the meat to the indirect side. I went with fat side up. Start your smoke. Here I added chips to my smoke box. You can you also apply smoke with a separate smoker box or an aluminum foil pouch with slots.

Cook at approximately 250 degrees until 190 minimum in all locations. 195 to 200 is fine. It took me 11 hours.

Remove from the grill and wrap tightly in double sheets of heavy-duty aluminum foil.
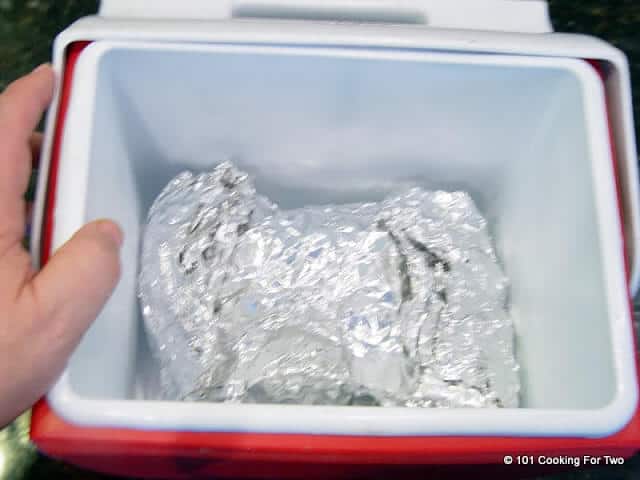
Place in a cooler for 2 hours.

Hand shred with a couple of forks. The bone should come out clean.
- Course Main Course
- Cuisine American
- Course Main Course
- Cuisine American
- 4-5 pounds Pork Shoulder AKA pork butt
- 1 cup rub of your choice or 8:3:1:1
- 3-4 cups wood chips type of your choice
- 1/2 cup brown sugar
- 3 tablespoons kosher salt
- 1 tablespoon chili powder
- 1 teaspoon black pepper
- 1 teaspoon onion powder
- 1 teaspoon garlic powder
All nutritional information are estimates and may vary from your actual results. This is home cooking, and there are many variables. To taste ingredients such as salt will be my estimate of the average used.
If you like this recipe or find it useful, the pleasure of a nice 4 or 5 rating would be greatly appreciated. Rating is done by clicking on the stars above.
Related Posts:
Reader Interactions
The preparation time is agonizing. I can’t wait to eat it LOL.
Great tip on wrapping in the foil and putting in the cooler. Had pulled pork on the 4th of July made in a crock pot. Love that you used the grill
This looks amazing! That photo with the sauce is truly mouthwatering.
That’s how I started out smoking on my natural gas grill around 2002, but I never did a pork butt that way, just ribs.
The pulled pork just looks so tasty! I can’t wait to try that one myself, though the preparation is really loong! I kinda just want to skip on it and just go directly to eating. lol!
I spent the day working around the yard, but not before following your process/recipe. I put a small 3.5 pounder on the grill at 11am, and it just hit 190 degrees at 6pm. I’m hungry! But it’s going to get wrapped in foil and into the cooler til 8pm. I guess its steak tonight, and pulled pork tomorrow. Fingers crossed!
Cut the waiting time to 30 minutes and eat tonight…2 hours is traditional but I have been known to cheat…
Thanks for sharing. This was really great! My girlfriend and I ended up mixing the brown sugar sauce, same quantity : )
Well, here it is 1:30am Maryland time. Just finished giving my 4.5lb Pork Shoulder a good rub down, using Doc’s recipe. Up at 7 and let the smoking begin. Hickory chips are bathing and the grill is marked for 250 . Have my electronic thermo. As long as the natural gas don’t get shut off, I’m good to go! Premade some Eastern Carolina vinegar sauce to go with it. Will post follow up.
Leave a Reply Cancel reply
Primary Sidebar

Homemade Holiday Candy

Crock Pot Fudge

4 Ingredient Crock Pot Chocolate Peanut Clusters

Easy Oreo Fudge
Chocolate Pretzel Buttons

Easy Homemade Candied Nuts

Easy 5 Minute Fudge
Top Comfort Foods

Old Fashion Salisbury Steak with Onion Gravy

Easy One Pot Broccoli Cheese Soup

Easy Crock Pot French Onion Soup
Crock Pot Honey Garlic Chicken Breast

Crock Pot Ham Bone and Bean Soup

Ultra Simple Crock Pot White Chicken Chili
Todays Most Popular Recipes


About DrDan
More about DrDan
FTC disclaimer
Copyright Information
Privacy Policy · Copyright 101 Cooking For Two LLC © 2017 All Rights Reserved
Pulled Pork Recipe for your Grill
Our pulled pork recipe guides you through the indirect cooking method to attain a succulent, fall apart, smoked pork wonder, on your charcoal or gas grill.
Our ancestors roasted these critters over a hot wood fire, with the meat slowly turned on a spit. Tedious and boring, to say the least.
Bless the modern BBQ grill, friends and good libations.
It's far more fun to cook a roast on a backyard grill! Indirect heat, smoke, a careful watch of the temperature, and our pulled pork recipe, will assure your backyard fame.
We believe that.
"Barbecue is the Mystical Communion of Fire, Smoke and Meat"
Review our "6 Secrets to Smoking Meat" page, to assure your pulled pork is a competition-grade winner!
If you have a smoker, Please visit "Pulled Pork Recipe For Your Smoker" page, for a competitor level pulled pork recipe for your charcoal or gas smoker.
The stuff you'll need:
Note: We've added in-context links to some of our pages, and to some great products we know, and use extensively.
Patience Low and slow is the real secret to a great pulled pork recipe. We're talking temperatures of 200-230В°F/93-110В°C for several hours. You'll need a bucket load of this virtue when you smoke pork on a grill. Figure about 1.0-1.5 hours/lb.
Gas/charcoal grill A gas grill, with at least two burners, is needed for indirect cooking. A kettle type charcoal grill (our very favorite being the Weber Kettle Grill), or a rectangular charcoal grill will work great also.
Be certain you have plenty of gas, or charcoal, for the duration! For charcoal cookers, figure at least 8 lbs/3.6kg.
Meat Pulled pork is made with the pork shoulder. A whole shoulder weighs around 12-16 lbs/5.5-7.3kg, however it is usually packaged in the supermarkets as two cuts. A Shoulder Butt (Boston Butt) and a Picnic Butt (Arm Picnic Roast or just Picnic Roast). Butts weigh in at about 9-10lbs/4.0-4.5kg with picnics at 5-6lbs/2.3-2.7kg, and either are great for this pulled pork recipe.
NOTE: Bone-in or boneless is your choice with Picnic roasts. We like the bone-in for flavor, however the boneless does cook faster.
Spices Our pulled pork recipe calls for a rub, and enjoy putting together our own with these basic fresh ingredients:
- Salt (Kosher preferred)
- Sugar (turbinado or brown)
- Paprika (Hungarian much preferred for best flavor)
- Pepper, black (fresh ground!)
- Chili powder
- Cumin (ground)
- Cayenne pepper (ground)
- Mustard (dry)
- Coriander (ground)
- Thyme (dried leaves, crushed)
Go to our Dry Rub Recipes for more on rub preparation.
Hardwood chunks/chips Use only hardwood for any grill. For smoked brisket we like Hickory, Oak, or Mesquite, or a combination.
Smoker box, or pouch Some gas grills come with a smoker box for the wood chips. If yours does not have one, you can get this heavy-duty beauty, or make an envelope/pouch from heavy-duty aluminum foil. We buy the 18" box of foil and pull out about 18" for the envelope. Put about 4 cups of pre-soaked (in cold water for about an hour) chips on the foil; fold into a flat envelope/pouch shape, and poke a several slices in the top to release the smoke.
Tongs You need a darn good pair of tongs to handle a pork roast. Long and strong is the secret, like our two favorites, the Weber Professional-Grade Chef's Tongs or the Oxo Good Grips 16-Inch Locking Tongs.
Gloves From our experience, and a preference of most grill-masters, a good set of BBQ gloves for handling the meat, are mandatory. We love and use these Barbecue Insulated Food Gloves for "pulling" the pork and wrestling any roast off the grill or smoker.
Aluminum roasting pan (disposable, for ease of clean-up) To keep the juices from causing flare-ups, and to provide moisture. If you do not have a convenient market close by, we've found Weber's Aluminum Drip Pans (Set of 10) an excellent buy.
Oven/Grill thermometer This is very important as we've found that the thermometers on the smokers are often off by several degrees. Our favorites are the CDN High Heat Oven Thermometer and the Admetior Kitchen Oven Thermometer.
Instant-read thermometer To "pull" pork, the meat must reach the ideal temperature of 190В°F/88В°C. For pork roast we want 140В°F/60В°C. Our two favorite, accurate, inexpensive tools are the fast reading CDN Proaccurate Quick-Read Digital Thermometer and the faster Thermoworks Super Fast Water-Resistant Digital Pocket Thermometer.
Chimney-type charcoal starter For the charcoal smoker folks, this is the best way to start, and maintain, the coals. In our opinion, you can't beat the Weber Rapidfire Chimney Starter for quality and ease of operation.
To rub, or not to rub. If you simply smoked a pork roast with no rub, it will be an absolutely wonderful, succulent hunk o' meat! But for our pulled pork recipe we love a great rub to enhance the meat's flavors so.
Our pulled pork recipe starts with a rub:
Mix together thoroughly the following:
- 1 cup salt
- 4 tbsp garlic powder
- 4 tbsp onion powder
- 2 tbsp ground thyme
- 2 tbsp ground bay leaves
- 2 tbsp black pepper
- 2 tbsp celery seed
- 2 tbsp Hungarian paprika
Out of time? Don't want to mess with making a rub? Do what we do in a clinch. use Pappy's Choice Seasoning. It's a favorite with many professional chefs!
Now, let's prepare the meat.
NOTE: Pork should be always kept in the refrigerator (below 40В°F/4.4В°C) prior to preparation.
Trim the any skin and excess fat (leave about a 1/4" layer) from the roast. Rinse, pat dry with paper towel.
We like to apply the rub the day before "fire" time for the most effect, but try to do it at least 2 hours ahead, using this method.
Apply the rub liberally all over the meat, working it in thoroughly. Cover with plastic wrap and refrigerate until an hour or so before cooking. It is best to allow the pork to come close to room temperature before putting it on the grill.
Get the grill ready
- For the gas grill folks, fire-up all burners, and get the temperature to hold at 210-225В°F/99-107В°C. We found it to be imperative that a good oven thermometer, placed on the meat (cooler) side of the cooking grill, be used to ensure that the cooking temperature is true. Note that the lid thermometer will indicate a higher temperature, and that number should be used only as a reference.
When the temperature is reached, shut down all but one burner.
- Place the smoker-can/smoker pouch, over the hot burner, close the grill and let the smoke get started. This will be the last time, during the cooking cycle, you will have anything to do with the smoke. Too much smoke when you smoke pork makes the meat bitter tasting, and the smoke process is actually done in the first couple of hours.
For the charcoal grill, fire-up the charcoal. we like the chimney charcoal starter because it's the quickest and easiest way to start, and maintain the coals. For this pulled pork recipe, you'll need to replenish the coals occasionally, to maintain the ideal temperature of around 210-230В°F/99/110В°C. Use your oven thermometer, placed near the meat, to keep track of the heat.
NOTE: Please, if you use a charcoal lighter fluid, allow the coals to burn to a grey ash coating. Never use self starting charcoal. There are several good "fire-starters" on the market that will not taint the meat, or impart potentially dangerous chemicals to the food.
- For the Weber-style cookers. start with about 45-50 briquettes. Let them get to a white/gray color. Bank the coals to one side of the grill and open the bottom and top vent fully.
will need to add more hot coals (about 8 or so) several times
during the cooking cycle, to maintain the temperature. Watch
the temp. and anticipate this with about a 15 minute lead.
- Charcoal grills require that you control the temperature with the bottom/side vents. Open the vent for more oxygen (heat). Adjust the top vent to at least half open, and leave it alone.
- Put the smoker box/pouch over the coals. Now, close the grill and let the smoke get started. This will be the last time, during the cooking cycle, you will have anything to do with the smoke. Too much smoke makes the pork bitter tasting, and smoking is actually done in the first couple of hours.
NOTE: Always use tongs! Never use that forked, sharp, pokey-thing that comes with all backyard barbecue tool sets. It is for carving meat only! It will pierce the meat, and allow the juices to run out.
When the grill temperature has reached 250-275В°F/121-135В°C.
- Place the roast in the pan, on the grill, opposite side of the fire, fat side up, to begin cooking. Maintain the temperature at 210-225В°F/99-107В°C. Close the lid, with the vent opposite the roast (to pull the heat and smoke towards the meat), and.
- Resist peeking! You're loosing precious heat and smoke. Open the lid only long and far enough to do the job.
- With tongs in hand, check the meat for the first time in about an hour. Make sure the temperature is holding. For a charcoal grill, add hot(gray) briquettes (about 8-10). You will need to check again in about 45 minutes to ensure the grill temperature has not dropped. Add prepared coals (8-12 per hour) as needed.
- Rotate the meat (quickly)about every 30-40 minutes, to cook evenly.
- You have time! If you have judiciously maintained the cooking temperature, peeked, you can leave your station several times before the pork is done. Towards the end, grab that instant-read thermometer and.
- Check the roast(s) at the thickest part, not touching a bone, and look for 190В°F/88В°C for pulled pork, and 140В°F/60В°C for a pork roast. Pull it off of the grill and rest the meat for about 20-30 minutes. This allows the juices to flow back to the center, and to finish cooking.
Our pulled pork recipe will produce a wonderful, natural flavor, but if you wish (or if you must) you can now bring out your favorite BBQ sauce and.
You can now "pull" the meat. We just use gloves, and a couple of forks (it's hot!), to separate the good stuff out. Place it in a pan/pot, over low heat, to keep the meat warm for serving.
This pulled pork recipe will give you an exceptionally moist, tender roast, perfect as is, but many folks like to have a "finishing" or table sauce with their meat. This can be any barbecue sauce you enjoy, or a traditional "Southern U.S., vinegar based barbecue sauce" served in a bowl along with your pulled pork. Try this traditional favorite:
Old Time Eastern North Carolina Barbecue Sauce Recipe
- 1/2 pound butter
- 1/2 cup apple cider vinegar (white will work also)
- 3 tblsp lemon juice (approx. 1 lemon)
- 1 1/2 tblsp Worcestershire sauce (preferably Lea & Perrins)
- 1 tblsp honey
- 2 tsp salt
- 1 tsp black pepper (fresh ground if you have it)
Once the butter is melted in a saucepan, stir in all but the vinegar, and bring to a boil. Remove the pan from the heat, stir in the vinegar, and allow the sauce to cool.
Quick and Easy Pulled Pork Tenderloin Recipe from Weber's Time to Grill™ by Jamie Purviance
Grocery List
Meat / Poultry / Seafood
- 2 pork tenderloins, each ¾ to 1 lb
Oil and Spices
- 2 tbsp extra-virgin olive oil
- 1 tsp freshly ground black pepper
- 1.25 tsp granulated garlic
- 1 tsp kosher salt
- 1 tsp prepared chili powder
Condiments
- 2 tbsp cider vinegar
- 1 cup ketchup
- 1 tbsp molasses
- 1 tbsp Worcestershire sauce
- 2 tbsp unsalted butter
Special Equipment
- instant-read thermometer
Ingredients
- 1 cup ketchup
- ½ cup water
- 2 tablespoons unsalted butter
- 2 tablespoons cider vinegar
- 1 tablespoon molasses
- 1 tablespoon Worcestershire sauce
- 1 teaspoon granulated garlic
- ½ teaspoon freshly ground black pepper
- 1 teaspoon kosher salt
- 1 teaspoon prepared chili powder
- ¼ teaspoon granulated garlic
- ½ teaspoon freshly ground black pepper
- 2 pork tenderloins, each ¾ to 1 pound, trimmed of excess fat and silver skin
- 2 tablespoons extra-virgin olive oil
Instructions
In a small saucepan whisk the sauce ingredients. Bring the sauce to a simmer over medium heat and simmer gently for about 5 minutes, whisking occasionally. Set aside to cool at room temperature.
In a small bowl mix the rub ingredients.
Lightly coat all sides of the tenderloins with the oil and season evenly with the rub, pressing the spices into the meat. Allow the tenderloins to stand at room temperature for 15 to 30 minutes before grilling.
Prepare the grill for direct cooking over medium heat (350° to 450°F).
Grill the tenderloins over direct medium heat, with the lid closed, until the outsides are evenly seared and the internal temperature reaches 150°F, 15 to 20 minutes, turning about every 5 minutes. Remove from the grill and wrap with aluminum foil. Let rest for about 15 minutes or until cool enough to comfortably handle.
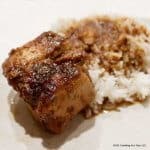
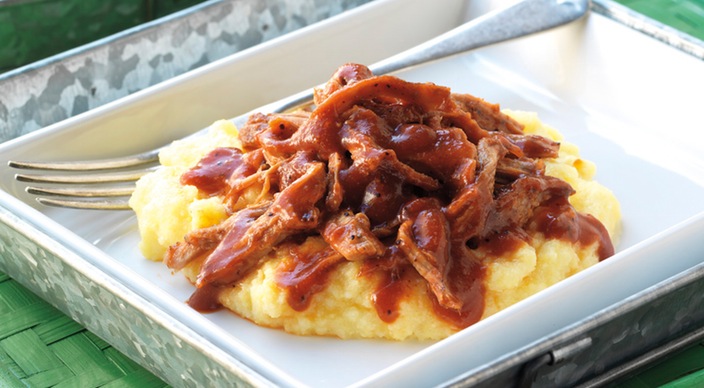
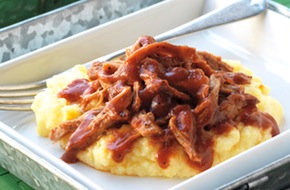
Cut the tenderloins crosswise into quarters. Pull the warm meat apart with your fingers or use two forks to shred the meat. In a large bowl moisten the pork with as much of the sauce as you like. Serve on a bed of soft polenta, if desired.
Tips & Techniques

Techniques
Two-Zone Fire

Techniques
Gas Grill Setup

Techniques
Preparing Pork Tenderloins
Got a Question?
We are here to answer your grilling questions. Just ask.
Easy and delicious
Prior to making this, I've always made pulled pork in a crock pot over 6 hours. This was faster, just as easy and tasted better. As I was shredding the cooked pork, I tasted a bite and ended up eating more even before adding the sauce. It was great with the sauce, but I'd also make the pork just with the rub as it was really good on its own. Went really well with the polenta too.
Type of Griller
Would you recommend this recipe? YES
Top Rated Recipes

Pork Tenderloins with Creamy Corn Rating: 5 stars
Quick and Easy Pulled Pork Tenderloin Rating: 5 stars
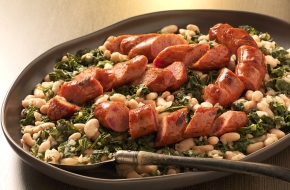
Andouille Sausages with Stewed Greens and White Beans Rating: 5 stars
Share Recipe
Show your friends, family, and neighbors what they have to look forward to at your next barbecue.
A link to the following recipe will be included in the email:
How to Make Authentic Pulled Pork on a Gas Grill
My first attempts at making pulled pork a year or two ago were extremely delicious, but totally inauthentic. I used, dare I say, a slow-cooker. You can check out the horridly bad photos of that early Shared Appetite post here: slow-cooker pulled pork. Over the past couple of years, my affinity for making a more authentic version of Pulled Pork grew hungry… especially after attending the Big Apple BBQ Block Party in NYC and having numerous conversations with some BBQ enthusiast friends. Purchasing a smoker really wasn’t in the cards, being that my now wife and I were saving big time for our wedding and I just obtained a super awesome gas grill. I needed to figure out how to smoke up some pork shoulders in an authentic way… on an inauthentic gas grill.
The results were… well, you take a look:
My brother and sister-n-law got me the Big Bob Gibson’s BBQ Book by Pitmaster Chris Lilly over the summer for my birthday, so I was excited to try the Eight-Time World Championship Pork Shoulder recipe for my first attempt at real ‘cue.

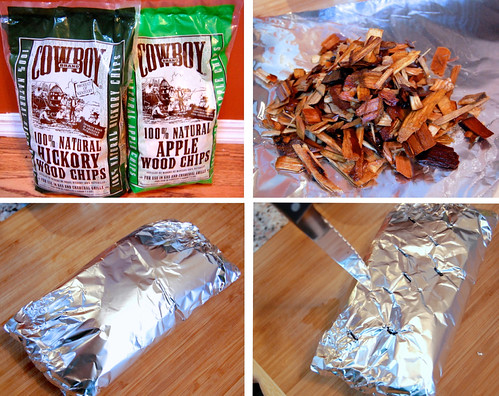
Let’s first talk about wood. You can use wood chunks or wood chips. I found a nice variety of wood chips at the local “home improvement warehouse”, and picked up a bag of both Hickory and Apple wood chips. If you only wanted to use one type of wood, go with Hickory, which is Bob Gibson’s wood of choice. According to Lilly, “smoldering hickory wood gave his meat a depth of smoke flavor unmatched by other woods.” If you can’t find wood in a store near you, Amazon.com is a good place to start.
If you are using wood chips, which I used, you need to create a bunch of foil wood chip packets. Place a small handful of wood chips in the middle of a piece of aluminum foil. Fold over and create a seal, and then pierce several openings in the top of the pouch with a sharp knife. You are probably going to need about 8 packets for the entire smoking process.
The first time I made a smoked pork shoulder, I read that it was important to soak the wood chips for at least an hour before putting them on the grill. This way the wood chips don’t catch on fire and burn up. You want them to smolder and smoke, not burst into flames.
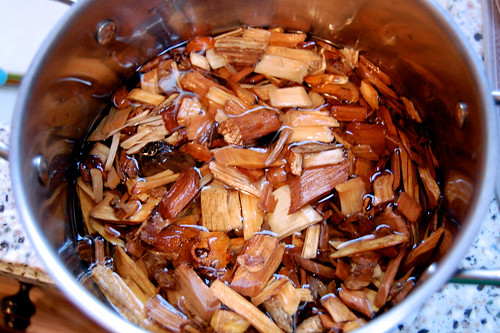
But then after talking to some BBQ enthusiasts and checking out this great article, Mythbusting: Do I Have To Soak My Wood, I was enlightened that it was in fact, a myth. Soaking the wood chips really doesn’t do anything. That’s good in my book… one less thing to worry about! The second time around I didn’t soak the wood chips at all, and they still smoldered and smoked perfectly on the grill.
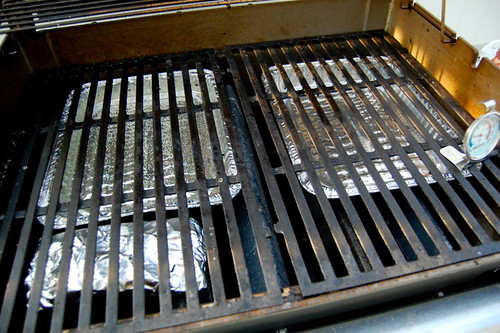
Onto the set up of your gas grill. The #1 most important tool you need for this project is an oven thermometer placed on the grill grates. After reading some articles on the subject and testing it out myself, I found that the built-in thermometer on your grill hood really is useless. It was constantly 50° off from the actual temperature on the surface of the grill grates.
You are also going to need two disposable aluminum-foil shallow roasting pans. Place them underneath your grill grates, directly on the flavorizer bars (the things that cover and protect the actual burner tubes). Fill the one on the left with water. You will need to refill this water pan throughout the process, probably every 2-4 hours as the water evaporates. What’s the purpose of the water pan? The water absorbs heat and helps keep temperature fluctuations to a minimum. (Note: The water should not boil… if it is boiling, the grill is too hot).
The foil packet of wood chips should be placed directly in front of the water pan, directly on the flavorizer bar(s).
You want to set up your grill for indirect cooking. This means that only one side of the grill will be ignited, and the meat will be placed on the void side, away from the heat. In this case, we are heating the left side of the grill only (the side with the water pan and wood chip foil packet). Start by turning on just the left-most burner on the lowest setting possible. Close the lid and let it come up to temperature. For smoking, you want to try to stabilize the heat between 225-250°. If it is close but not quite at 225° yet, try bumping up that burner a little bit. If it’s not close to 225°, try turning on the adjacent burner on its lowest setting. Remember, the magic range you’re looking for is 225-250°. You may have to tweak the burners throughout the process, as outside temperature, rain, wind, etc. can all affect the inside of the grill.
For instance, at some points I just had the left burner on the lowest setting. Some points I had to increase the heat of that burner to maintain the 225-250° range. When it was really cold or windy, I had to additionally turn on the adjacent burner on the lowest setting. Experiment with your grill and tweak as necessary.
Okay, onto the actual pork shoulder…
The first time I made this recipe, I could only find a 10-ish pound pork shoulder. Ideally, you want to get a whole pork shoulder, about 16-18 pounds of meat (which I definitely did the 2nd time around by ordering it ahead of time from the local butcher).
Cut off a lot of the visible fat (you can leave some) and the hide/skin from the underside of the shoulder.
Using a meat syringe to add a liquid injection, which increases the moisture in the pork and allows its flavors to permeate the meat, is optional . The first time around, I didn’t have meat syringe and left this part out. If you have a meat syringe, go for it! For the injection, combine 3/4 cup apple juice, 1/2 cup each water and sugar, 1/4 cup salt, and 2 tbl. worcestershire sauce. Stir until the sugar and salt dissolves, then load up the meat syringe and inject the meat at 1-inch intervals from the top side of the pork shoulder only. Use the entire solution (if you have the full 16-18 pounds of meat).
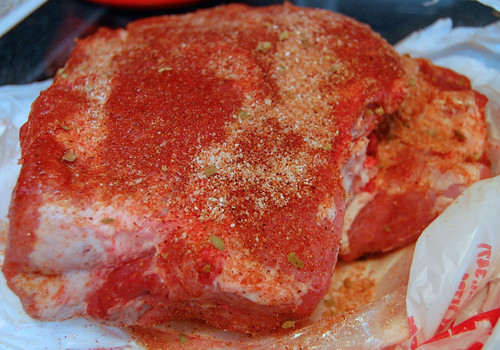
Lastly, create a dry rub by combining 1/2 tbl. brown sugar, 1 tbl. regular granulated sugar, 2 1/4 tsp. garlic salt, 2 1/4 tsp. Kosher salt, 1/2 tbl. paprika, 1 tsp. chili powder, and an 1/8 tsp. each dried oregano leaves, cayenne pepper, ground cumin, and black pepper. I just eyeballed the measurements and it came out great. Apply the dry rub all over in an even coating, patting so the rub adheres.
The pork shoulder should be placed directly over the empty disposable aluminum pan on the right. It will catch all the drippings melting off the slow-cooking shoulder. Remember, this is the void side of the grill. Only the left-hand side of the grill is ignited.
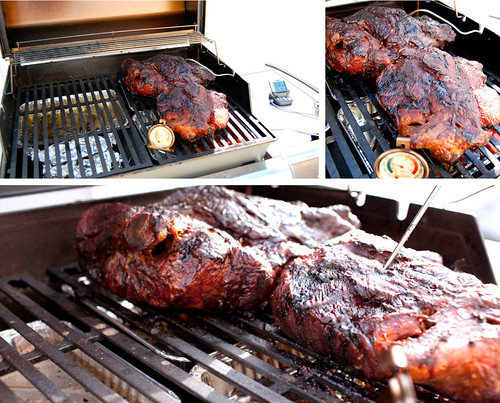
Maintain the temperature between 225-250°. Add water to the water pan as it dries out and add a new foil packet of wood chips when the one on the grill runs out. You will know when it is time to replace the packet when smoke no longer comes out. After about 12-13 hours, that pork shoulder will look glorious and triumphant, kind of like this:

The second time I smoked some pork shoulder, I wised up and did 2. If you are going to go through this whole process, you might as well get the most bang for your buck (the finished pulled pork freezes well and reheats well). Also, in the picture below you will notice a metal spike sticking out of the pork shoulder with a long wire. This is a Polder Probe Thermometer. Simply put the probe into the center of the pork shoulder (not touching the bone) and set it to 195°. It will start beeping like crazy when it reaches that temperature, which makes it super easy to know when your pork shoulder is ready!
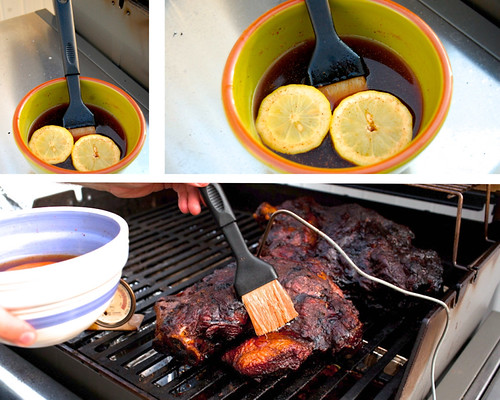
After the 12-13 hours, you are going to want to start basting it with a Vinegar Mop. I ventured away from Big Bob Gibson’s exact recipe a bit, making a vinegar mop by combining 2 cups apple cider vinegar, 1 tbl. ancho chile powder (not really spicy, just a smoky flavor), 1/2 tbl. salt, and 2 slices of lemon. You need to make this vinegar mop ahead of time to give the flavors time to meld. Big Bob Gibson’s recipe recommends making it at least 24 hours ahead of time, although I typically make it at the same time I make the dry rub and injection.
Baste the pork shoulder(s) about every hour until the pork is done, reaching that 195°.
Just a word of warning: At some point during the process, you will probably experience “THE STALL”. This is the point during the cooking process where the temperature of the pork doesn’t rise, at all, for several hours. The internal temperature of your pork shoulder might even decrease a few degrees during this time. It is a normal part of the process and a whole article dedicated to it here (Thanks James!). If you are running short on time, growing impatient, and want to get through THE STALL quicker, wrap your pork shoulder in aluminum foil at that point. Either way, the stall will pass and you will get to that 195° eventually!
And here you have it, after about 16-18 hours, this pork is done!
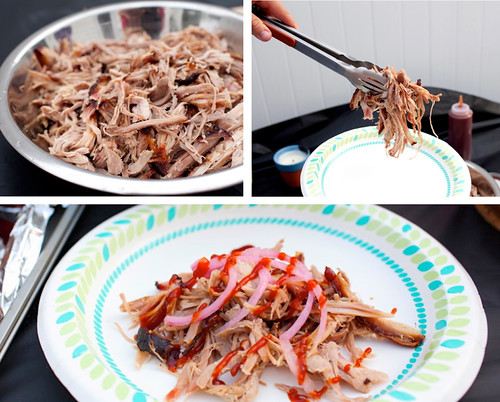
Transfer the pork shoulder(s) to a cutting board or sheet pan and let it cool for about 30 minutes. Give the bone a good tug and it should release easily. As you being pulling and shredding the pork with your hands, remove any visible pockets of fat. You may want to put on some rubber gloves if the meat is too hot.
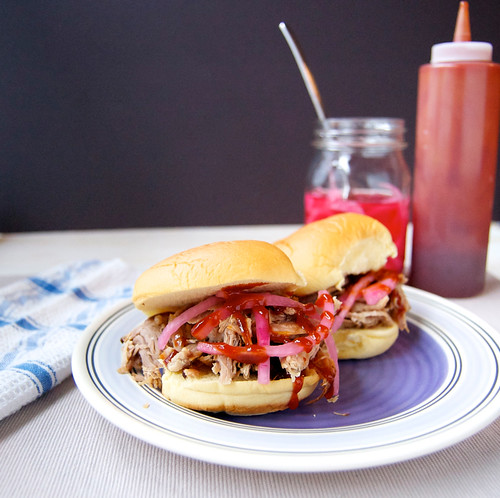
Serve it with some pickled red onions: Combine 1/2 cup apple cider vinegar, 1 cup water, 1 tbl. sugar, and 1 tsp. salt. Stir to dissolve sugar and salt. Pour over thinly sliced red onions and let sit at room temperature for 1 hour. You can make them ahead of time and store in the refrigerator for about 2 weeks.
You of course also need some good BBQ sauce! I made Big Bob Gibson’s Memphis-Style Championship Red Sauce. You can find the recipe for that below.
And the best thing about pulled pork is that it lasts for meals and meals, and reheats very well low and slow in the oven wrapped in aluminum foil.
Of course making some pulled pork sliders is also a fantastic treat.
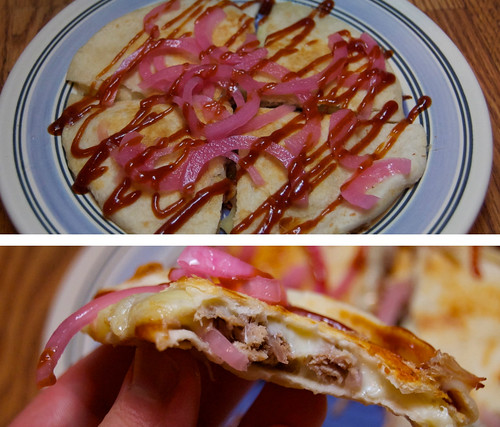
And as that pulled pork is almost gone, you can stretch it to another entire meal by making some pulled pork quesadillas! I make them with either monterey jack or pepper jack cheese.
Yes, smoking a pork shoulder for pulled pork is a long, labor intensive process. Yes, it takes pretty much an entire day. And yes, it is 100% totally worth it. I typically start the process on a Friday night, waking up every 2-ish hours to change the wood chip packet and fill the water pan. That way it is ready for a big Saturday dinner feast. Trust me, it’s worth it.
Eight-Time World Championship Pork Shoulder
5 from 1 reviews
Ingredients
- 1 (16-18 pound) Whole Pork Shoulder
- 1/2 tablespoon Brown Sugar
- 1 tablespoon Granulated Sugar
- 2 1/4 teaspoons Garlic Salt
- 2 1/4 teaspoons Kosher Salt
- 1/2 tablespoon Paprika
- 1 teaspoon Chili Powder
- 1/8 teaspoon Dried Oregano Leaves
- 1/8 teaspoon Cayenne Pepper
- 1/8 teaspoon Cumin
- 1/8 teaspoon Black Pepper
Injection (optional)
- 3/4 cup Apple Juice
- 1/2 cup Water
- 1/2 cup Sugar
- 1/4 cup Salt
- 2 tablespoons Worcestershire Sauce
Vinegar Mop (adapted)
- 2 cups Apple Cider Vinegar
- 1 tablespoon Ancho Chile Powder
- 1/2 tablespoon Salt
- 2 slices Lemon
For Garnish
- Pickled Red Onions
- Memphis-Style Championship Red Sauce
Instructions
- Set up your grill for indirect cooking as described in post above.
- Make the vinegar mop by combining its ingredients and letting sit at room temperature in a small bowl. Chris Lilly suggests making it at least 24 hours ahead of time and storing it in a tightly sealed container to really let the flavor meld, but I have just been making it right at the beginning of the cooking process and it comes out great that way too.
- In a small bowl, combine the dry rub ingredients. I usually just eyeball the measurements and it comes out great. Mix well and set aside.
- If using the injection: In a separate mixing bowl, combine all the injection ingredients and blend until the sugar dissolves. Using a meat syringe, inject the meat evenly at 1-inch intervals from the top side of the pork shoulder only, using the entire amount of the injection solution.
- Apply the dry rub to the meat in an even coating, patting so the rub adheres.
- When the heat on the grill reaches and stays steady at 225°, place the pork shoulder on the side of the grill opposite the heat source and close the lid. Cook for 16 – 18 hours, give or take, until the internal temperature of the meat reaches 195°. Add the wood chip foil packets about every 2 hours and refill the water pan as necessary. After 12-13 hours of cooking, begin basting the shoulder with the vinegar mop every hour.
- Once the pork shoulder reaches 195°, remove from grill and let rest on a cutting board for 30 minutes. Pull the pork by hand, discarding visible fat.
Memphis-Style Championship Red Sauce
5 from 1 reviews
- Yield: 4 cups
Ingredients
- 1 1/4 cups Ketchup
- 1 cup Water
- 3/4 cup Apple Cider Vinegar
- 3/4 cup Tomato Paste
- 3/4 cup Brown Sugar
- 2/3 cup Corn Syrup (if you have it, if not, no worries)
- 1/2 cup Pure Maple Syrup
- 4 tablespoons Honey
- 3 tablespoons Molasses
- 4 teaspoons Salt
- 4 teaspoons Worcestershire Sauce
- 1 tablespoon Applesauce (I typically just use Apple Juice)
- 1 1/2 teaspoons Soy Sauce
- 1 1/2 teaspoons Liquid Smoke (I omit this)
- 1 teaspoon Onion Powder
- 3/4 teaspoon Cornstarch
- 1/2 teaspoon Dried Mustard Powder
- 1/2 teaspoon Cayenne Pepper
- 1/4 teaspoon Black Pepper
- 1/8 teaspoon Garlic Powder
- 1/8 teaspoon White Pepper (I didn’t have this and omitted it)
- 1/8 teaspoon Celery Seed
- 1/8 teaspoon Ground Cumin
Instructions
- Combine all ingredients in a medium saucepan and then bring to a boil over medium-high heat. Reduce heat and simmer over medium-low heat for 10-15 minutes. Allow to cool, then transfer to a tightly covered jar or plastic container. Store refrigerated for up to 2 weeks.
By Categories
Search
sound good I am trying it wed
Sounds great! When’s dinner Wednesday?! I’ll be there, haha. Let me know how it turns out and enjoy!
This looks absolutely delicious! I just moved into my new condo with free natural gas, purchased my new BBQ last weekend and now I have something worthy to try on it! Ill be sure to save some for you Chris!
Awesome Darlene! Yes, save me some haha! Let me know how it goes 🙂
Trying this recipe with pork I shot in Oklahoma back in December…just in time for Superbowl!
Oh wow very cool! Let me know how it goes!
This is an EPIC post! Haha, thanks for taking the time to go through the entire process, and the pictures make everything look so amazing! I just got a propane smoker this year, I will have to give this whole pulled pork thing a try. Those quesas have my mouth watering!
Thanks Warren! You definitely need to try pulled pork on your smoker! It’s awesome!
Hey Chris, Just found this post and it looks delicious! I just purchased a smoker and am thinking of tweaking this recipe for the smoker – any suggestions? Lastly, how many people does a 16-18lb pork shoulder feed? I will probably be doing this for July 4th so there will be plenty of mouths to feed. Thanks!
Thanks so much for the question Lauren. I purchased an electric smoker too last summer and have made this pork shoulder a bunch of times. It’s pretty much the same process… get the smoker to that magic temperature (225-250) and maintain that temp, fill with wood chips every now and again (my electric smoker can only handle a certain amount of wood at a time, so I have to refill it every 2 hours or so). I stop using wood chips about 12 hours in or so. It’ll take the same amount of time to cook as if it were on a gas grill (16-18 hours or so).
Hmmm, is the pork shoulder the only thing you’re serving? It’s tough to say. I did some poking around some bbq forums for you and it seems like you should plan on 1 to 1.5 uncooked pounds of meat for each person (because once cooked that will equal about 1/2 pound of meat per person). So I would say a 16 pound pork shoulder will feed 12-16 people. I normally also cook up some other bbq essentials… burgers, dogs, chicken, so in that case your pork shoulder will go a lot further. Have a lot of fun! Hope it turns out great!
Lucas Gascon says
Looks delicious. Planning to attempt this over the weekend! Probably a silly question but was wondering how much water u put in the foil pan at a time?
I just fill it up about 3/4 of the way full and refill as it evaporates. Good luck! Hope it comes out awesome!
Very well written guide to pulled pork, will try this coming Saturday for the first time! A question though.. I assume that the 16-18 hour cooking time applies to a pork shoulder that is 16-19 pounds?
I will probably start of with something smaller (8-10 pounds), and just want to check (for planning) if I can expect it to ready in lets say 10-12 hours?
Thanks for all the info!
Hi Mattias, I’m honestly not entirely sure. I don’t think it would take that short of time… maybe 14 hours-ish. I would try to google it and see what you can come up with. I know I’ve done picnic cuts before (which is about that 10 pound range), and it still took about 14 hours. Happy smoking!
Trackbacks
[…] cornbread as an accompaniment for two very important culinary occasions in our house: when I make Authentic Pulled Pork on a Gas Grill and for cornbread croutons to garnish Fire Roasted Chili with Beer Braised Short Ribs (that recipe […]
[…] me, making chili is like spending the day smoking a pork shoulder to make pulled pork. Yes it’s time consuming, but also deeply satisfying and a culinary spectacle. It takes […]
[…] as a side to any of your Mexican favorites. I usually also make them as a supporting role to my Authentic Pulled Pork on a Gas Grill for summer […]
A Dude Food Blogger?
I know! We actually do exist. Hey, I’m Chris. Husband. Teacher. Photographer. Avid lover of all things food, especially Mexican and dessert. Sharing is caring. Eat. Cook. Share.
Stay Connected.
Let's Be Friends! Subscribe and Get My Brand Spanking New Recipes Delivered Right To Your Inbox.

Meatball, Spinach, and Ricotta Pizza
Healthy Cauliflower Rice Burrito Bowls

No Churn Olive Oil Ice Cream with Roasted Peaches
The Ultimate Chicken Souvlaki with Tzatziki and Israeli Salad
Popular Posts


I know! We actually do exist. Hey, I’m Chris. Husband. Teacher. Photographer. Avid lover of all things food, especially Mexican and dessert. Sharing is caring. Eat. Cook. Share.
Pulled Pork on a Genesis Rotisserie
This was my first attempt at cooking a pork butt on my Genesis rotisserie. It was incredibly easy and turned out great but there are a few things I will do different next time. If you are considering making pulled pork using the rotisserie on your Weber Genesis all I can say is, “Go for it!”

In the morning I ran the rotisserie spit through the butt and inserted the forks as deeply as I could. I panicked a little when I realized there was a big old bone in this thing but it was pretty easy getting the rotisserie spit around the thing.

I turned the front burner to High until the pecan started smoking then cranked it down to low. The middle and back burners were off. I let this guy spin on the rotisserie for seven and a half hours. Every now and then I opened the grill, replenished the water in the drip pan and took some pictures. Here is what it looked like after five hours.


I let the pork rest on the rotisserie spit for about an hour before I disassembled the set-up and pulled the pork.


Here is a little video of that butt spinning around!
Frank Denison says
I did my pork roast with a 4 pound shoulder on the rotisserie on my Genesis gas grill. I used a Weber Carolina rub and dipping sauce ( will try to attach them). While it was spicy hot for Houston tastes my contribution to Thanksgiving disappeared very quick, beating all other meats on the table. For burner I jiggled the front and back trying to stay around 250-275. I went about 190 internal temperature. It looked a lot like yours.
The next year I did an Asian marinade ( 20 hours) tri-tip beef roast on the rotisserie to. It too vanished quickly.
I like your writing, David.
Carolina Pulled Pork
Sauce (Use fresh where you can)
2 tablespoons molasses
1 tablespoon white wine vinegar
1 tablespoon Dijon mustard
1 tablespoon light brown sugar
2 teaspoons Worcestershire sauce
1/2 teaspoon kosher salt
1/4 teaspoon Tabasco=C2=AE sauce
1/4 teaspoon granulated garlic
1/4 teaspoon freshly ground black pepper
1-1/2 teaspoons whole black peppercorns
1-1/2 teaspoons mustard seed
1-1/2 teaspoons paprika
1-1/2 teaspoons light brown sugar
1-1/2 teaspoons kosher salt
1 teaspoon granulated garlic
1 teaspoon granulated onion
1/4 teaspoon ground cayenne pepper
Thank you for visiting and your kind words!
I also appreciate you sharing your recipe. A lot of folks don’t like to share 🙂
I like the idea of an Asian marinated tri-tip. I will need to give that a try!
Kimbi laver Pulled Pork på kuglegrillen.

At lave PP på kuglegrillen er ikke noget besværligt noget, og det kræver heller ikke en masse ekstra tilbehør, så som rotisserie eller wok.
I sommerferien havde jeg bare min kuglegrill med på camping, og jeg havde lyst til at få PP.
Jeg startede kl. 5 om morgenen med at anrette briketter rundt i grillen
Sørg for at de ligger tæt, så ilden kan vandre. Og heller lægge for mange briketter op, end for få, da resten altid kan bruges senere.
Fyld en foliebakke med vand midt mellem briketterne.
Så godt med tørt træ på briketterne. Jeg har her brugt hickory.
Nakkefileten har jeg dagen forinden gnedet godt ind i en rub, og så pakket film omkring.
Et rør med 10-15 briketter antændes.
Når de er helt klar, lægges de op i den ene ende af briket-ringen.
Så er det bare at lægge nakkefileten på over vandbadet.
På med låget, og så have et termometer til kødet, og et til grilltemperaturen.
I starten køre jeg med bundspjæld helt åbent.
Lige indtil grillen når 110 grader i temperatur.
Så lukker jeg næsten helt til. Topspjæld er fult åbent hele tiden.
Det kan dog være, at man skal regulere lidt på bundspjældet undervejs, men husk: Altid små reguleringer, ellers vil det blive meget svært at styre.
Efter næsten 13 timer på grillen, var kernetemperaturen nået op på 99 grader, og stegen er klar til at blive taget af.
Jo højere man lader kernetemperaturen komme, jo lettere er det at ”pulle” stegen. Hæld lidt æblejuice, æblecider-eddike samt lidt rub over kødet, og rør godt rundt.
Og så er det jo bare at nyde det med sit yndlingstilbehør. For mit vedkommende er det i en burgerbolle, med BBQ-sauce og rødløg
Barbecued Pork Shoulder on a Gas Grill

Barbecue. There is nothing better than a good pork shoulder roasted “low and slow” as they say, over wood smoke. The long cooking time and low temperature ensure a succulent roast.
Well the smoke is the whole point of barbecuing in the first place, otherwise you could just as easily use a slow cooker.
The thing is, to do this right, you really need a smoker, or a barbecue with a separate box for wood chips. I don’t have either. I may get a smoker at some point, but at the moment, I do have a perfectly functional 2-burner gas grill.
The good news is that you can indeed achieve a pretty decent barbecue with your grill, if you watch the temperature and keep up the smoke. It just takes a big more finagling and a lot more attention.

I’ve barbecued a half dozen pork shoulders on my grill over the last few weeks, just to get the method solid. What follows is the approach I used to get the best results.
I found this grill method works best with a 4 pound Boston butt shoulder roast, instead of an 8 pound picnic shoulder roast. With an 8 pound roast you are basically getting up really early in the morning to hopefully have the meat done by dinner time.
With a 4 pound roast, or two 4 pound roasts cooked at the same time, the whole timing of the barbecue is more manageable.
The meat requires several hours of smoking to get infused sufficiently with smoke flavor. After that, it’s just easier to finish, wrapped in foil, in a 300° oven.
It’s hard to maintain a consistent low temperature on a grill, gas or charcoal. Wrapping in foil in the oven helps to capture all of the juices and rendered fat from the last hour or so of cooking.
With a good rub, and a long smoke, barbecue sauce isn’t really necessary. But do feel free to add some of your favorite barbecue sauce at the end, when you’ve pulled the pork apart.
Any experienced grill barbecuers out there? I’d love to hear your tips for perfecting barbecued pork shoulder on a grill.
Barbecued Pork Shoulder on a Gas Grill Recipe
- Prep time: 1 hour
- Cook time: 8 hours
- Yield: Serves 6-8
Note that this cooking time is for a 4-pound Boston butt pork shoulder. A general rule on barbecued pork is to cook it at about 215°F to 225°F for 90 minutes per pound.
If using a rub, you'll need to get the rub on the night before and refrigerate.
Cooking a 4 pound roast, allowing time for the barbecue to heat up and for the meat to rest once done, can easily take 9 hours, so start early in the morning if you want to have the roast done in time for dinner.
You need to keep smoke on the meat for at least 4 hours for a 4 pound roast. If the roast isn't done after 6 hours, finish it in the oven, wrapped tightly in foil to hold in the moisture.
Two rub recipes are provided here. Pick one for a 4 pound roast, or if barbecuing two roasts, try one each.
Ingredients
- One 4 pound pork shoulder roast, preferably Boston butt, boneless or bone-in (you can easily make two 4 pound roasts in about the same amount of time if your grill is big enough to accommodate them both)
- 5 to 6 cups of wood chips, hickory, oak, apple, or other fruit wood
BBQ Rub (enough for a 4 pound roast)
- 2 Tbsp brown sugar, packed
- 2 Tbsp white sugar
- 2 Tbsp paprika
- 1 Tbsp kosher salt
- 1 1/2 teaspoons ground cumin
- 1 1/2 teaspoons garlic powder
- 1 1/2 teaspoons chipotle chile powder
- 1 1/2 teaspoons black pepper
Santa Maria Rub (enough for a 4 pound roast)
- 1 Tbsp salt
- 1 Tbsp finely ground black pepper
- 1 Tbsp garlic powder
- 1 Tbsp onion powder
- 1 teaspoon cayenne
- 1 Tbsp dried oregano
- 1 teaspoon dry rosemary (or fresh, finely minced)
- 1/2 teaspoon dry sage
- 1/4 teaspoon sugar


1. Prepare the rub. Mix all the ingredients for the rub together, breaking up any clumps. Taste the rub as you make it and see if you like the taste, adjust accordingly.


2. Rub the roast with the rub. Unwrap the pork roast and place it on its butcher paper or in a roasting pan, something that can catch the rub. With your (clean) hands work the rub mixture into the pork shoulder all over, including inside any crevasses you may find in a boneless roast where the bone had been. Be generous with the amount of rub. Rewrap it in the butcher paper or wrap it in plastic and place it in a pan (to catch any liquid that may drip out), and refrigerate it overnight.
The night before:

3. Soak the wood chips. Take 3 or 4 large handfuls of wood chips (hickory, oak, apple or other fruit wood) and place them in a bowl and cover them with water to soak them overnight (can also do for an hour before using). I think it helps to have a mix of sizes, from small chips to larger (1-inch x 2-inch) chunks. The smaller chips will get smoking more quickly, but will burn out more quickly too. The larger chunks will take longer to catch, but last well past when the smaller chips have burned themselves out.
4. Bring the chilled roast to room temp. 1 to 2 hours before you start the barbecue, take the pork out of the refrigerator to come to room temperature. Now, if you forget to do this, which I have done, you can still go ahead and BBQ it. You'll likely be finishing it in the oven anyway. It will just take a bit longer to cook.

5. Prepare your grill. Remove one of the grill grates. This will be your "hot" side, where the wood chips will go. The other side of the grill will be the "cool" side, and where the meat will be, away from direct heat. Depending on the structure of your grill, you may want to remove the "flavor bar", the thin metal piece with lots of holes in it that sits over the burner. The wood chips will smoke more easily if they lay in a (fireproof metal or foil) container directly on the burner.

6. If there is room on your grill, place a small aluminum tray of water on the grill to help moderate the heat and help keep the roast from getting too dry. A good place to place this is on an upper rack if you grill has one.


7. Get the grill smoking. Create a double layered aluminum foil boat with a handful or two of damp wood chips in it. Place the boat directly on the burner on the "hot" side of the grill if you can (otherwise place on the flavor bar). Turn the grill on to medium flame, cover the grill and let it heat up until the the wood chips start smoking. You'll either see smoke coming out of the grill, or if you raise the lid, you'll see smoke coming out of the wood chip boat. You should see and smell the smoke. You'll be replenishing the wood chips periodically for the next several hours so put more dry chips into water to soak if needed.

8. Once the grill is smoking, place the roast on the grill grates on the cool side of the grill, away from direct heat. If your grill has a hot spot, position the roast away from it. If there is a fatty side to the meat, put that side facing up; the fat will render over time and baste the pork. Cover the grill, lower the flame, and let the cooking begin. The temperature you want to maintain ideally is 225°F. Try to keep it close to that temperature, within a range of 210°F to 240°F. If the temperature goes too high, the roast may dry out. If it's too low, it will take forever to cook.
9. Maintain the smoke and the 225°F temperature. This is the tricky part. You will want to maintain smoke in the grill for at least 4 hours (6 hours for a bigger roast). You will also want to maintain a cooking temperature of around 225°. So, you have to check the grill! Check if the temperature is being maintained between 210°F and 240°F, and check to make sure the chips are still producing smoke, every half hour. About once an hour you will likely need to replenish the chip boat with more wood chips. Resist the temptation to open the grill more than once an hour. Every time you open the grill the inside temperature drops and you increase your overall cooking time.


I found the best way to check the temperature, since I don't have a gauge in the grill itself, is to put an instant read meat thermometer into an opening in the hood on the meat side (cool side) of the grill, and just keep checking it. Make sure sensor tip of the probe is not touching the meat itself. You want to avoid opening up the hood too often, because every time you do that, you lose heat. Of course, if your gas grill gets too hot, opening the hood can cool it down quickly.
Expect a minimum cooking time, if you have been diligent at maintaining a 225°F, of 90 minutes per pound. So if you are cooking a 4 pound roast, total cooking time will be at least 6 hours (and easily more). An 8 pound roast will take at least 12 hours of cooking time. (If you want to cook 8 pounds of pork shoulder more quickly, I recommend starting with two 4 pound roasts, spaced on the grill a few inches apart, which will cook in just a little more time than an 8 pound roast.)
10 After 2 or 3 hours, during one of your hourly opening of the grill to refresh the wood chips, reposition the roast so that the side that was closest to the heat is now furthest from the heat.

11. Test internal temperature of meat. After about 5 hours, start taking the pork's internal temperature: You can eat it at 165°F, but if you are making pulled pork the meat needs to be ideally 195°F. When the meat reaches 195°F, remove it from the heat, tent it loosely with foil over a cutting board (to catch the juices) and let it rest for at least 30 minutes, and preferably 1 hour. If after 6 hours of cooking, if the meat hasn't reached 195° internal temp (usually after 6 hours, the internal temp on my roasts is about 155°F), my recommendation is to remove it from the grill and finish in the oven.


12. Finish in the oven. Wrap the roast in aluminum foil to help prevent it from drying out in the oven, and place it in a roasting pan, in a 300°F oven. Cook until the internal temperature of the roast reaches 195°F. If your starting internal meat temperature is 150°F or so, this can take anywhere from an hour to two hours. When it reaches temperature, remove the roast from the oven and let rest for at least 30 minutes, up to an hour.
13. Pull the pork. Pull the pork with 2 forks. Only now do you add any barbecue sauce (and any accumulated juices) to the meat. Taste it first: It might not need sauce at all, and if it does, add only a little at a time. One of the biggest sins of barbecue is to oversauce perfectly good meat.
Serve on a bun with or without sauce, and with or without coleslaw. Also great with grilled or raw pineapple.
Hello! All photos and content are copyright protected. Please do not use our photos without prior written permission. If you wish to republish this recipe, please rewrite the recipe in your own unique words and link back to Barbecued Pork Shoulder on a Gas Grill on Simply Recipes. Thank you!
If you make this recipe, snap a pic and hashtag it #simplyrecipes — We love to see your creations on Instagram, Facebook, & Twitter!
Showing 4 of 31 Comments
- Dana Morse
Tried for the first time last week. Came out really good had to finish in the oven,trying again this weekend. I think I’ve got the bugs worked out looking forward to perfection this time. Great for first timer like me. Thanks
- July 8, 2017
Delicious recipe! Had a six pounder and it only took 5.5 hours to smoke to perfection. No oven time, kept the heat at 230*.
so ive followed the steps as said. my problem was with a 4lb shoulder @250 for 6hrs on the grill and only opening every hr to check the smoke/bowl of water the middle was not cooking at all. transfered to the oven @300 for roughly an hour and a half and still the center wasnt cooking… i dunno what yall have done differently but this hasnt worked out in my favor! started at noon and still cooking!
Man oh man I be telling you, this is a great method! To think my husband wanted to ditch the BBQ we got with the house. He’s liking it now!
Looks wonderful. Wish mine was fall off the bone, but it wasn’t. Cooked by indirect heat for 7 hours. Maybe it wasnt long enough? I let it rest too. Didnt finish in the oven. Does that make the difference? Cooked at 250-275
You might also enjoy.
Recipe Categories
Main Ingredient
Special Diet
Season
Recipe Type


What's in Season?
Browse all of our December recipes.
Measurement Converter
Discover More
- Subscribe to new recipes for FREE!
- Follow Simply Recipes or get recipe updates on Twitter
- Press and Awards
Welcome to Simply Recipes

Thank you for stopping by! We love to share wholesome and delicious recipes, perfect for home cooked family meals.
DadCooksDinner
Pressure cooking, rotisserie grilling, and enthusiastic home cooking from a dad who cooks dinner every night
BBQ Pulled Pork on a Kettle Grill (Grilling Basics)

BBQ Pulled Pork on a Kettle Grill (Grilling Basics)
Pulled pork is my gateway to low and slow barbecue. Brisket is fantastic, and I lust after ribs, but pulled pork is easy and delicious. If you want to find out why people become barbecue fanatics, make yourself some pulled pork.
How? Well, if you have a real barbecue pit or smoker, it’s easy. (And you don’t need me to explain how to do it – you’re already an expert.) I learned how to make barbecue on my Weber Smoky Mountain. The WSM makes it easy to keep a low fire going for the eight to twelve hours necessary for real barbecue. But, that was back when I was a barbecue fool – I was doing ten hour cooks almost every weekend.

Pork butt oasts, rubbed and ready for the grill
Eventually, I moved on from my barbecue phase. (Also known as having kids. Suddenly, finding time for a ten hour cook every weekend was…difficult.) My poor WSM was neglected, and when I didn’t clean it out after my last cook of the year, all sorts of interesting things started growing inside. (I tried to clean it out, but I was never able to stop the spread of white fuzz.)
That’s when switched to doing barbecue on my kettle grill. It’s not as easy, but it’s definitely doable, and when I use the kettle as a regular grill it burns off anything left over from smoking.

Grill set up for indirect low and slow barbecue
The trick to using a kettle grill as a smoker is the Minion Method. Make a big pile of unlit coals, add a small amount of lit coals to the top, and use the airflow through the grill to control the temperature. The unlit coals provide fuel for the entire cook, as the fire slowly spreads through the pile. Opening the vents increases the temperature by speeding up the spread of the fire; closing the vents decreases the temperature by slowing down the spread of the fire. I start with my bottom vent half closed and my top vent half open to get the heat going. Once it hits 250°F I close the top vent down to halfway open, and control the fire by opening and closing the top vent. (Never close the vent all the way – you’ll smother the fire.) The Minion Method provides steady heat for eight to twelve hours of cooking, depending on how much charcoal you add to the grill.
I learned the Minion Method from the Virtual Weber Bullet website – it is the way they control the temperature on the WSM. It adapts pretty well to the kettle grill. If you dive deep into barbecue, you want to switch to a true barbecue smoker, and the WSM and the Virtual Weber Bullet are great places to start looking.

Pork butts on the grill
I use two other tricks to bring the cooking time down.
First, I buy a whole (8 pound) pork butt roast and ask my butcher to cut it in half. The two smaller roasts cook a lot faster than the entire roast.
“Faster” is relative – 8 hours for two roasts, vs 12 hours for one huge one. This *is* low and slow barbecue we’re talking about, after all.
The final trick is the Texas crutch – wrapping the pork in aluminum foil once it reaches 150°F. This speeds up the cooking time by avoiding the dreaded “barbecue stall”, where the internal temperature gets into the 160s, then sits there for hours before the temperature starts climbing again. Wrapping the pork in foil traps the heat, braising the pork, and speeding the cooking time. I want 195°F internal for tender, sliceable pork shoulder, and 205°F for pullable pork. (I’m shooting for 205°F in this recipe.)
Now, pork shoulder is forgiving. As long as you get it to 205°F internal, and cook it for hours, the results will be great. If the heat spikes up to 400°F, or down to 225°F, the pork will be fine; it will just change the cooking time. Get the temperature back between 250°F and 300°F as soon as you can, but it’s not the end of the world if the grill is running hot or cold.
And, when you’re done? Shred the pork with a pair of forks, mixing the delicious, mahogany bark from the outside of the roast with the tender meat on the inside. (If you’re in a hurry, get a pair of Bear Paws.) Serve on cheap white buns with your favorite sauce, and (traditionally) dill pickle slices and cole slaw. Finally, consider the purchase of a WSM as you devour your awesome low and slow pork.
Recipe: BBQ Pulled Pork on a Kettle Grill (Grilling Basics)
- Kettle Grill (I love my Weber Performer)
- 2 fist sized chunks of smoking wood or 2 cups soaked wood chips (preferably hickory; oak, apple, or cherry are also good)
- 9 by 13 aluminum foil pan
- 18″ wide heavy duty aluminum foil
- Probe thermometer (not absolutely necessary, but it makes it easy to check the pork’s temperature without opening the lid)

BBQ Pulled Pork on a Kettle Grill (Grilling Basics)
- Author: Mike Vrobel
- Prep Time: 20 minutes
- Cook Time: 8 hours
- Total Time: 8 hours 20 minutes
- Yield: 12-16 servings
- Category: Barbecue
- Cuisine: American
Description
BBQ Pulled Pork on a Kettle Grill recipe. How to make low and slow barbecued pork shoulder on an everyday kettle grill.
Ingredients
- 2 (4-pound) bone in pork shoulder roasts (one 8 pound pork butt roast cut in half)
Barbecue rub (just enough of my homemade rub for this recipe)
- 2 tablespoons kosher salt
- 2 tablespoons paprika
- 2 tablespoons brown sugar
- 2 teaspoons chili powder
- 2 teaspoons ground black pepper
- 1 teaspoon garlic powder
- 1 teaspoon onion powder
- 1/2 teaspoon dried thyme
Serve with
- Barbecue sauce (I love my homemade Easy BBQ Sauce and Carolina Mustard Sauce on pulled pork)
- Cheap white hamburger buns
- Dill pickle chips
- Cole slaw
Instructions
- Rub the pork shoulder: Sprinkle a heavy coat of the rub over the pork butt roasts. Pat the rub onto the meat to help it stick, and work it into any natural seams in the meat. (Don’t actually “rub” the roast, or most of the spices will wind up on your fingers.)
- Set the grill up for indirect low heat: Set your grill up for indirect low heat, 250°F, with a drip pan on one side of the grill and the fire as far over on the other side as you can get it. In my kettle grill, I open the bottom vents a crack, with the blades of the ash sweeper covering 3/4 of the rectangular holes. I make a tight pile of 80 unlit coals on 1/3rd of the charcoal grate, about three coals deep. (This is about 3/4 of a charcoal chimney’s worth of coals.) Put the two chunks of smoking wood on top of the unlit coals. Next, I light 10 coals in my chimney starter; when the coals are lit and covered with gray ash, I pour them on top of the unlit coals. Then I set the drip pan on the other side of the charcoal grate, add my grill grate, and brush it clean. I put the lid on the grill immediately, and set the top vent to halfway open.
- Cook the pork roasts: Put the two pork butt roasts on the grill over the drip pan and close the lid. Adjust the top vent to stabilize the temperature at roughly 250°F; let the temperature settle for fifteen minutes between vent adjustments. Once the temperature is stabilized, check the grill every hour to make sure the vents don’t need to be tweaked. (It’s OK if the temperature fluctuates; I try to keep it at 250°F, but anything between 225°F and 300°F is OK. Keep the lid closed – every time you lift the lid, heat will escape and the air you let in will cause the coals to heat up. I try not to open the lid until it is time to wrap the roasts.)
- Wrap the pork roasts and finish cooking: Cook the pork butts until they reach a temperature of 150°F in the thickest part, about four hours. Then, wrap the butts tightly with aluminum foil, put them back in the grill, increase the heat to 300°F by opening the vents more, and cook until they reach an internal temperature of at least 205°F, about four more hours. (Poke the probe thermometer through the foil and deep into the roast. Total cooking time is about eight hours for two four pound roasts. It is fine if the grill gets hotter once the roasts are foil wrapped – up to 350°F is OK.)
- Rest the roasts: Take the roasts off of the grill, put them snug against each other, and wrap both roasts in a single piece of aluminum foil to catch any leaking juices. Wrap a large towel around the foiled roasts to keep them warm. (I use a bath towel from our rag pile.) Let the roasts rest for one hour.
- Pull and serve: Unwrap the roasts and transfer them to a cutting board. Using two large forks, shred the roasts into bite sized pieces of pork, stirring the blackened bark from the outside with the shredded meat from the inside. Taste the shredded meat, and sprinkle with salt and pepper if the roast tastes bland. To serve, pile the pork on a hamburger bun. Top with sauce, cole slaw, and a couple of pickle chips, and dig in.

It’s a good sign when you can pull the bone out of the roast with just a tug.
- Can I do this on a gas grill? Yes, absolutely. It’s a lot easier to maintain the temperature, but you won’t get as much smoke flavor. Gas grills allow too much airflow, and airflow means that the smoke escapes. That’s OK – set your grill for 250°F, follow the instructions, and you’ll still get good pulled pork. It just won’t be as amazing as it is on a charcoal grill.
- What do I do if the fire’s running too hot? (Too hot means over 300°F, and you *really* want to keep it below 350°F). First, try closing down the vents as much as possible, without closing them all the way. (If you close them entirely, the fire will smother, and go out.) If closing the vents doesn’t help, add two cups of hot water to the drip pan – the water will absorb some of the heat and bring the temperature down.
- What do I do if the fire’s running too cold at the beginning? (Too cold means below 225°F, and you really want to keep it above 200°F) Open up the top vent all the way. If that doesn’t help, lift the lid, make sure the coals are lit (you should see some glowing embers), and leave the lid off of the grill for five minutes to get the fire going.
- What do I do if the fire’s running too cold after a few hours? Open the lid and check on your charcoal – is it all burned to ash? Add another 20 coals to the fire, leave the lid open for five minutes to get them started, then close the lid. (At this point, you may have to add more coals every hour or two to keep the fire going.)
- I can’t get this vent adjusting thing to work? If you’re patient enough, you can start with a low fire (40 coals lit), and add twelve coals to the fire every hour to keep the heat going. For shorter cooks this is how I maintain the fire…but adding coals every hour for eight hours gets repetitive, and opening the lid every hour slows down the cooking. It will take closer to five hours to get the roast to 150°F, and closer to ten hours to finish at 205°F.

Pulled and ready to serve
What do you think?
Questions? Other ideas? Leave them in the comments section below.
Related Posts
Enjoyed this post? Want to help out DadCooksDinner? Subscribe to DadCooksDinner via eMail or RSS reader, recommend DadCooksDinner to your friends, and buy something from Amazon.com through the links on this site. Thank you.
10 Comments
Made this tonight – turned out well! Worked fine on the gas grill, but just like you said, not as smoky. I really liked the way the spice rub turned out.
Great! Glad you enjoyed it.
Are u using lump charcoal or brickettes
Briquettes – Kingsford blue bag. (I haven’t had much luck with lump and the Minion Method.)
Its unconventional but I pressure cook a butt or shoulder in guineas for 1hour or so and let the pressure drop naturally. I trim the fat cap off before cooking. After it cools pull it with 2 forks and you got pulled pork in a delisious juice.
Missing the smoke but the guineas makes up for it and it’s a short cook with no fussing around watching the fire…
FYI. Pork for tacos at a “real Mexican” restaurant is boiled for hours not cooked on a grill or smoked. Pressure cooking cuts the time dramatically
I also throw in a whole onion or 2, so I can easily fish it out after cooking… After pulling add liberal amount of Penzey’s Arizona Dreaming spice blend. They also have a natural smoke granual, but I haven’t tried it yet..
I use the Minion Method on my kettle, but cheat with The Smokenator. Easily get 5-6 hrs of cook time on one load of coals. Have had several great cooks w/ St. Louis Spares this summer, and also chicken legs. Might do a whole shoulder at some point. http://www.smokenator.com/
Thanks for the recommendation – I’ve always wanted to try one of those out…
Will this work on the rotisserie?
Leave a Reply Cancel reply
WELCOME TO DAD COOKS DINNER
I'm Mike Vrobel, a dad who cooks dinner every night. I'm an enthusiastic home cook, and I write about pressure cooking, rotisserie grilling, and other food topics that grab my attention. Learn more about me.
Follow Dad Cooks Dinner
My Latest Video
Get Updates
Subscribe To Our Newsletter
Join our mailing list to receive the latest news and updates from our team.
You have Successfully Subscribed!
Pressure cooking, rotisserie grilling, and enthusiastic home cooking from a dad who cooks dinner every night

Комментариев нет:
Отправить комментарий